5 Easy Steps on Installing LED 12v Tape Lighting In Our Tiny Home
Being a lighting rep, of course, I am always thinking about proper lighting in Tiffany. They have all sorts of lighting options now, even a product called Tape light. Tape light comes on a strip of tape that has LED diodes on it. It can be cut, it's pretty flexible, ultra slim profile, energy saving, and most importantly, it has enough light output or lumens. Side note: lumens are the units used to measure light output from the LED's. Same idea as to how we compared watts on incandescent bulbs as how "bright" they are.
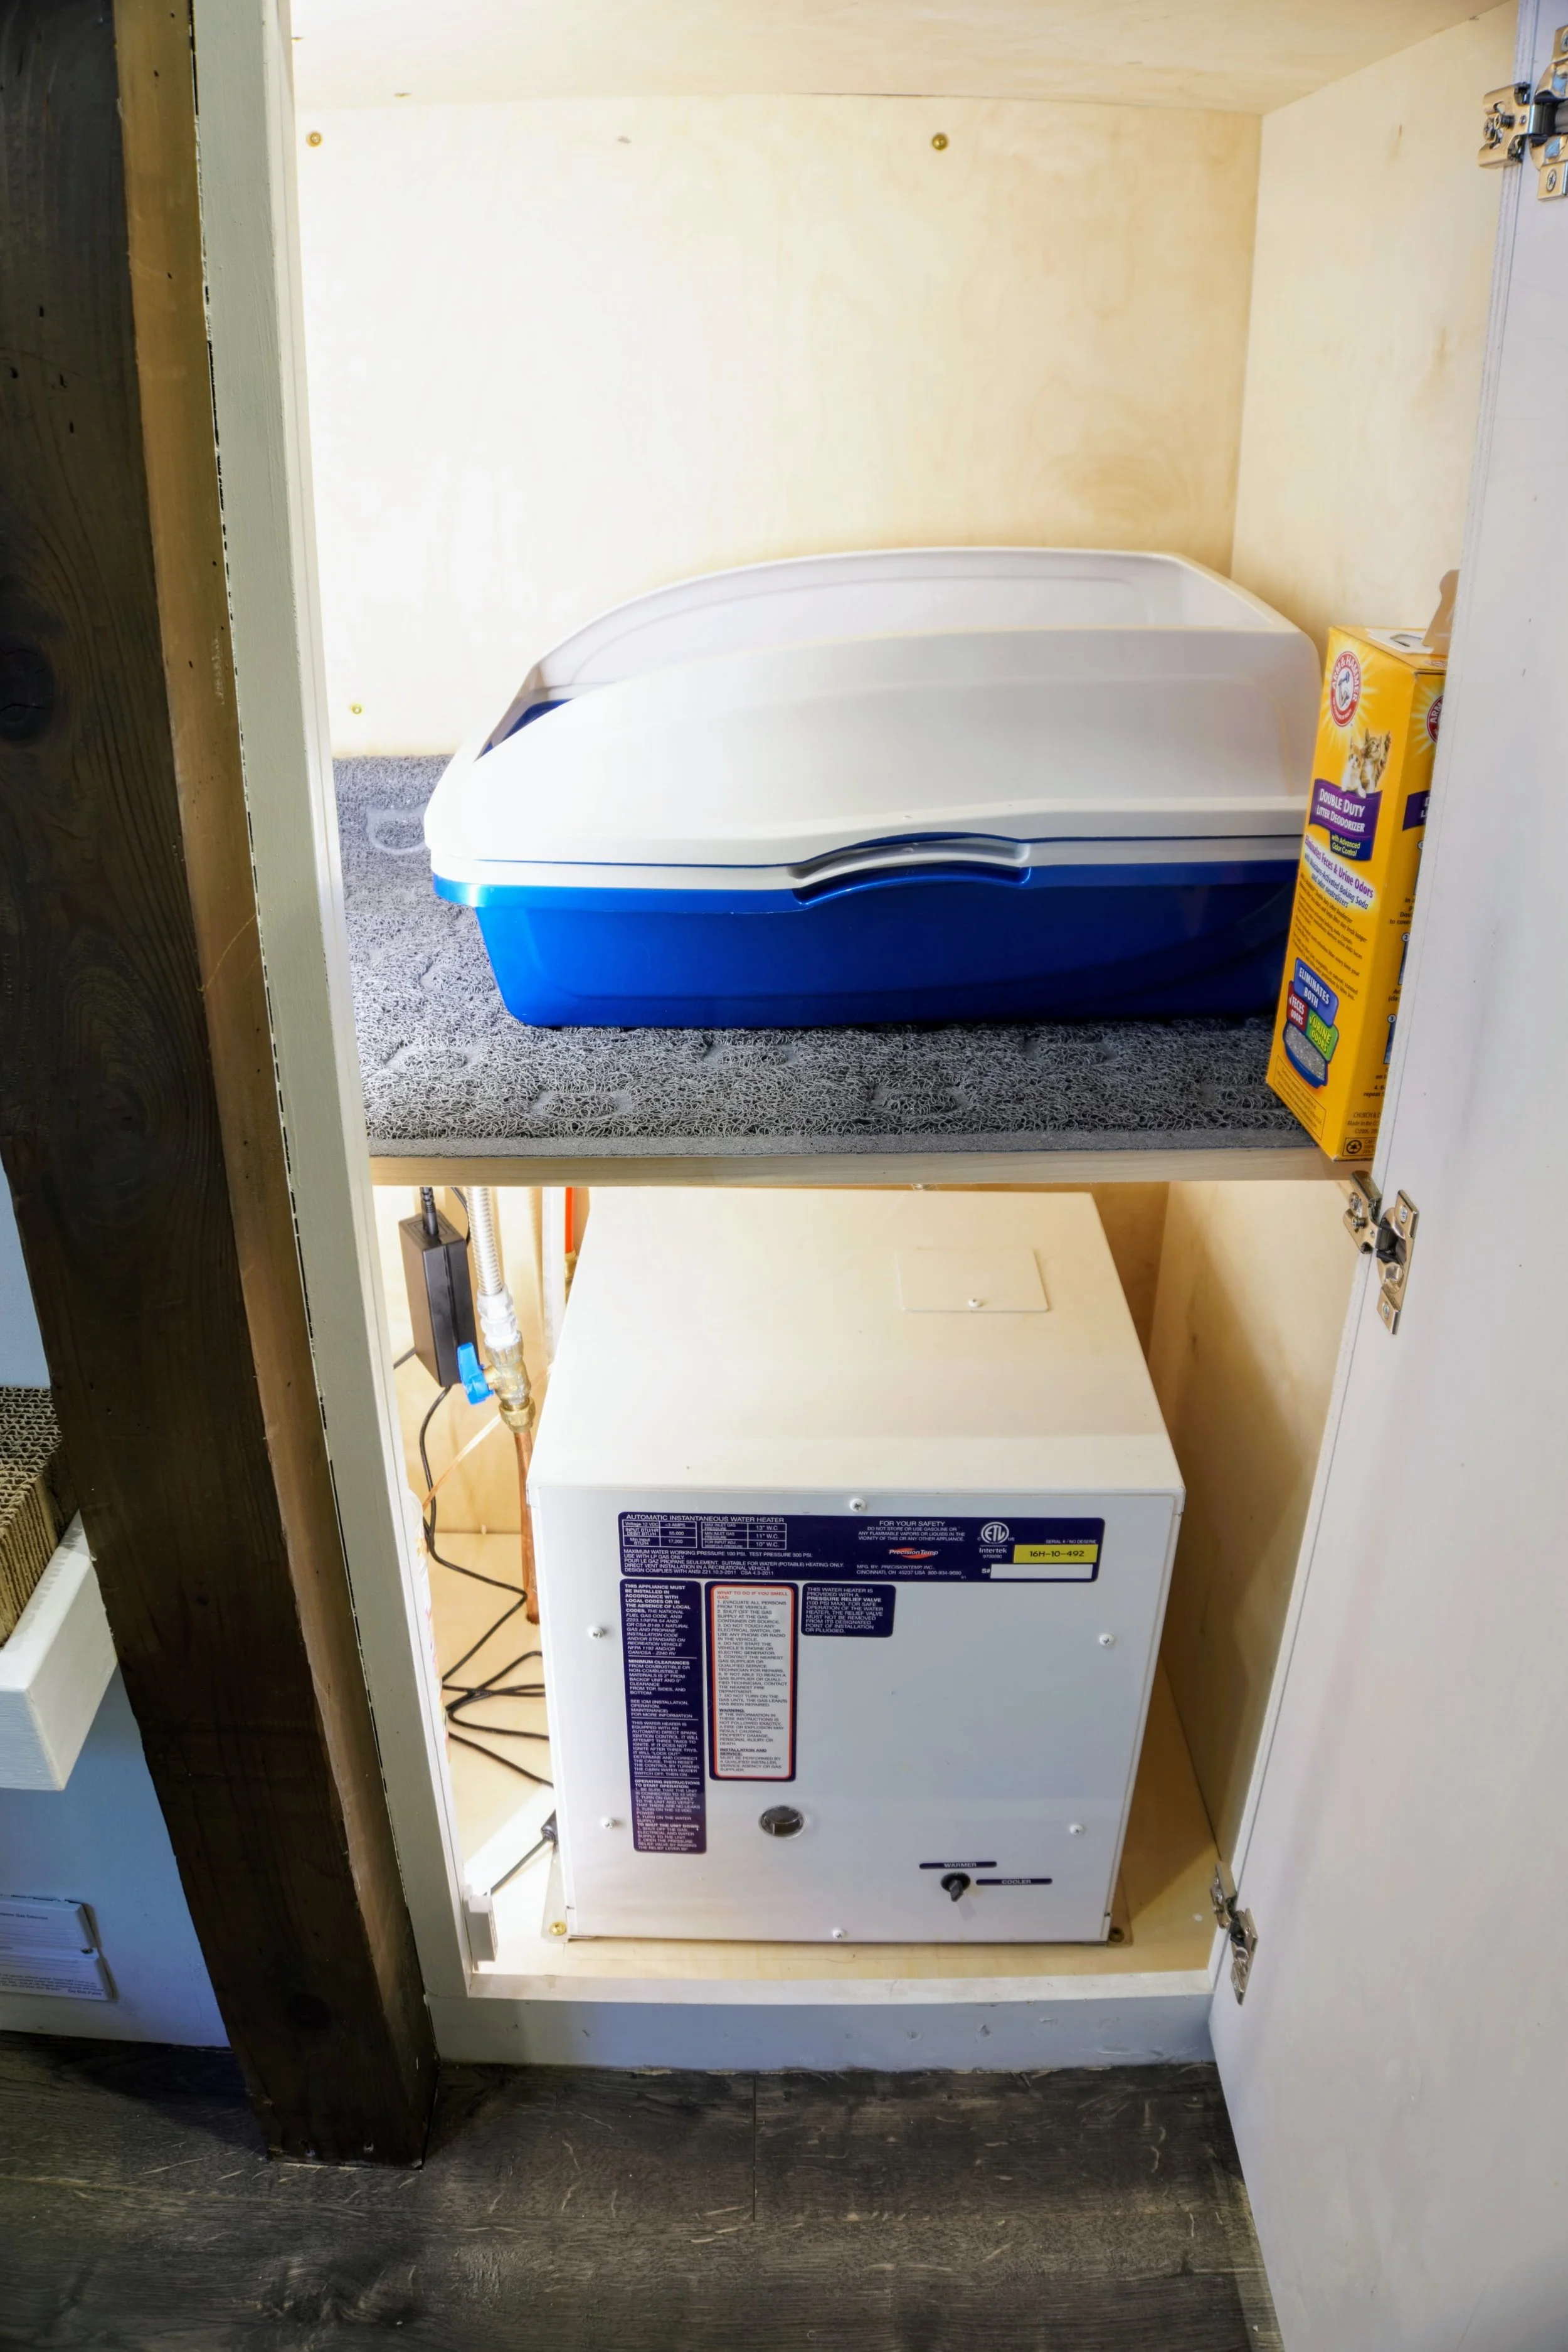
We put Oliver's litter box under the stairs and Adam was able to make this amazing kitty door for our buddy to slip in and do his business with a little privacy! We found ourselves needing light in there when we use our handheld vacuum to clean any kitty litter Oliver left for us clean. Conveniently, our water heater is located underneath his litter box with some of his food next to it. The water heater needs to have a converter because it is a 12v system as well. That converter for the water heater needed a wall outlet. So we ended up with an extra unused plug that we could use for lighting and didn't have to drill or mess with anything really electrical! Heck yes!
So instantly, I thought tape lighting. It can be used just about anywhere and in any design, really. So we broke it down into four easy steps:
1. Pick Your Kind of Tape
Not all tape is made equal, unfortunately. You can get really cheap tape on Amazon but good luck, you might as well take bets on crab racing (yes that is a thing in Florida). LED are crystals that grow and have different spectrums of color they naturally give off. Then manufacturers sort them into different levels of color spectrum called Binning. This makes sure that each diode appears to have the same color as the LED next to it. Depending on what "bin" you choose from the closer the color will match. So the old saying, "You get what you pay for" applies to the quality of LED tape you are buying.
After you have figured out your budget next comes color of light from the tape. LED colors are measured in units of Kelvin. Not Kevin, but Kelvin, I do it all the time. Kelvin is color range based on heat. The higher the heat (Kelvin) the "cooler" or bluer the color is. I am a 2700K-3000k type of guy which I think is as close to an incandescent bulb color you can get. Below is a list of common Kelvin temperatures with LED tape.
Warm-yellow light, use LEDs marked 2700 2900K.
Whiter light, use LEDs marked 3000-4100K.
Bluer white light, use LEDs marked 4200-6500K.
Measure out how much feet of tape you want to use and you can purchase the correct amounts in reels or sometimes custom cuts!
Side note: Some companies do make dry, damp (great for toe kicks or bathrooms from steam) and wet rated LED tape so make sure you double check to see what kind of tape you are buying.
2. Pick your connectors
There are two types of connectors: Power connector (connects to your power to turn them on) and inner connectors. Inner connectors connect two or more pieces of tape to light up at the same time. These are great if you have to connect two pieces of tape together to go around a corner of have a microwave in the middle and have to connect both pieces of tape together.
Based on your application your connector quantities will vary. Dry tape connectors are different than damp or wet rated tape connectors. So make sure you get the right ones you need to match your LED tape lighting.
When attaching your LED tape to your connectors, most are polarity sensitive. So make sure you match up the minus and plus signs on the connectors with the minus and plus signs on the LED tape lighting or else your LED tape will not light up.
3. Power Supply
So your home typically runs on 120v and in order to bring the volts down to 12v, you will need a power supply to help drop the volts so you don't fry the LED.
While looking at power supplies we need to look at the unit Watts. Depending on your tape you will see in the spec sheets on how many watts per foot the LED Tape light needs to actually light up.
From there you can add up how many watts the overall job will need. You can do this by adding how many feet of tape you are using and a total number of watts will tell you how big of a power supply you will need.
Example: We had 4 feet of tape and our tape uses 1.5 watts per foot. So we needed at least 6 watts power supply.
We bought a 30w power supply in case we wanted to add more LED tape in the future. Which we already have plans to add more! :)
Now for the install, even easier!
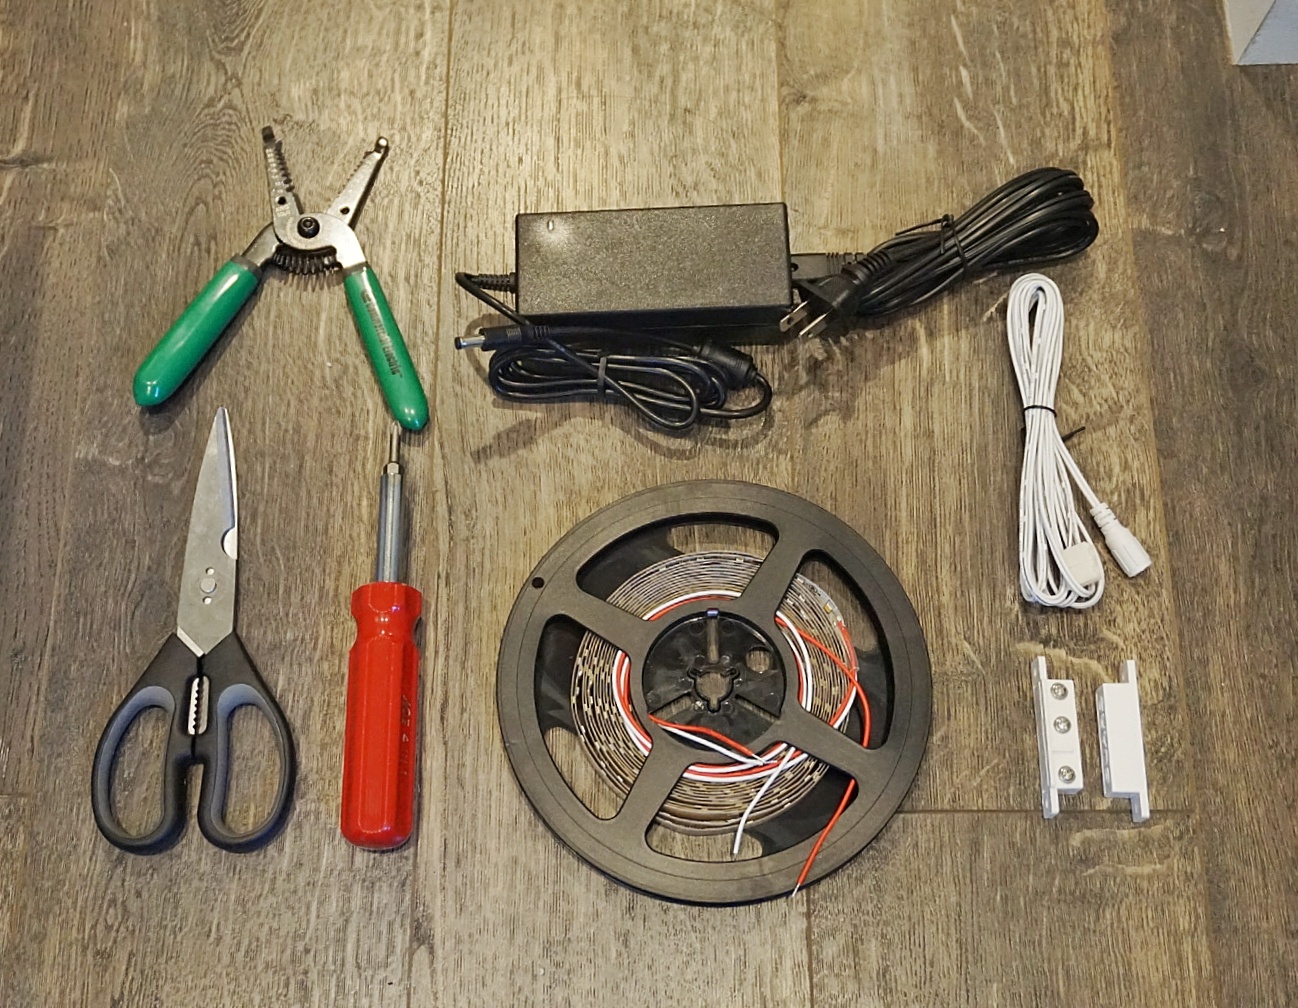
Tools needed for LED tape lighting install
1. Cut your tape to desired lengths on the copper marks and peel the backing off the tape.
2. Add your connectors if you plan on using any around corners or appliances.
3. Connect your power supply connector.
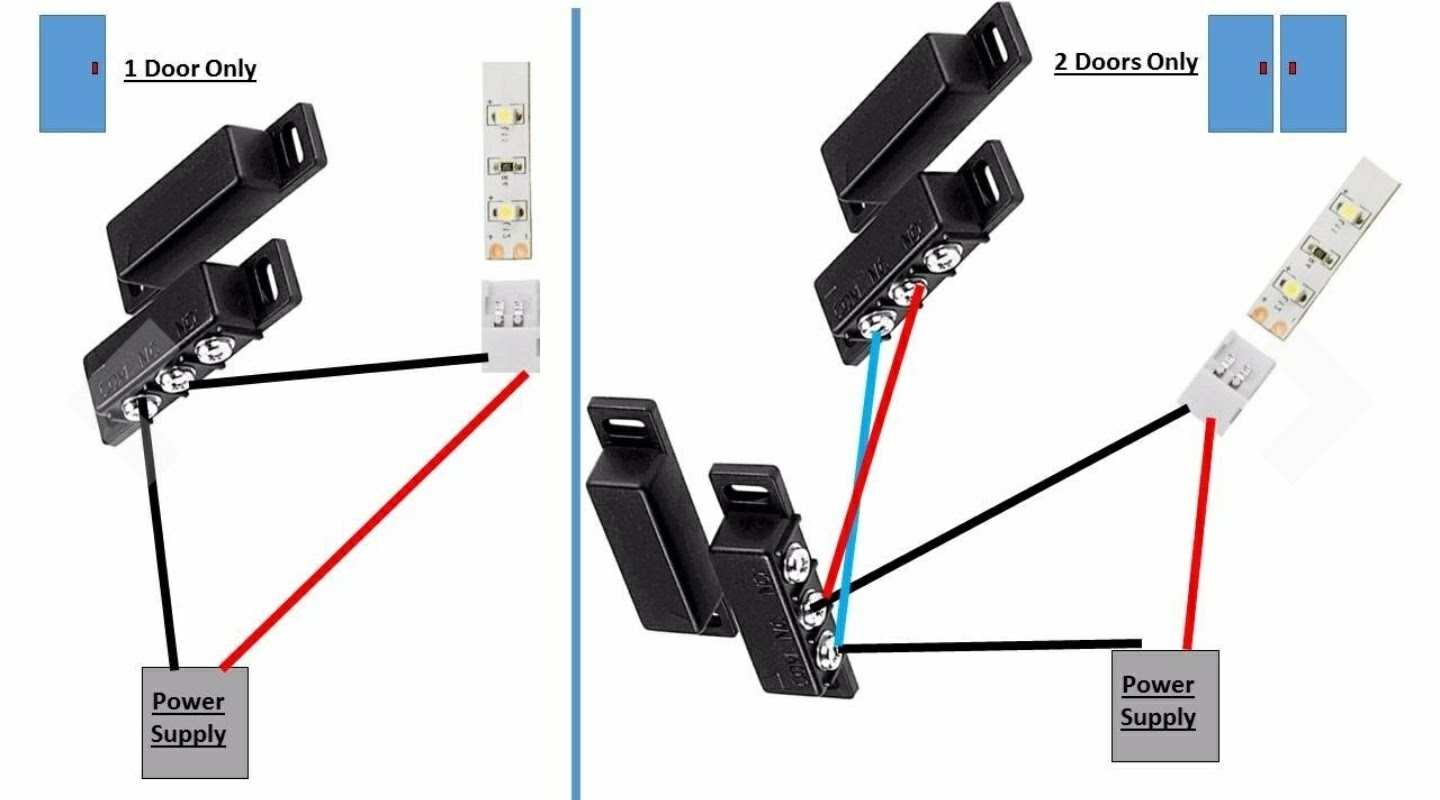
4. We added this magnetic switch from Amazon to our power supply connector in order for the LED tape to turn on and off when we open or close the door.
The diagram below is what we followed!
5. Finally, plug in your power supply into the connector and the wall.
There are a ton of tape light accessories you can add to your project! The nicest part about LED tape lighting is that you can really use this anywhere in your home, especially in tiny places. I have seen it used for accent lighting in kitchens, showers, sinks and even used as indirect main lighting for homes instead of recess cans! The sky is the limit!
WE ARE LAUNCHING OUR FIRST GIVEAWAY!!!!!!
We are giving away 16 feet of 12v DAMP rated LED tape lighting and install kit! This way you can replicate what we did in our new blog post about lighting up our storage and cabinets in order to see better in your own home!
The rules are easy:
1. Head over to our Facebook page and like our page, Tiffany The Tiny Home. (Link in bio)
2. Tag a friend in the comment section on this post or the Facebook post, someone that you think could use this as well!
3. Smile to the next person you see!
We will end the contest on July 12th 2017.


